When we launched our t3planet.com venture, One of the first super demands from our customers was “Support Composer” for premium TYPO3 products too.
Because as the TYPO3 People just love the Composer, the community also has a dedicated composer-server https://composer.typo3.org/
And, you know, we always learn lots from customer’s demand and feedback.
T3Terminal’s free TYPO3 products already have composer support with most popular Packagist.org But for a premium package, it was still manual installation.
Team T3Planet took the challenge and was super excited to make TYPO3 Satis Private packages for Composer.
One more thing, manier times you would have noticed that packagist.org is very-slow when you install and update your TYPO3 packages through composer. We recommend setting up your private Composer-server to have productive work.
We had a growing problem: every time we were pushing something on GIT, the CI would take more then five minutes to deploy a new version.
What’s the problem?
Two PHP developers Nils and Jordi have developed this cool PHP application-level package manager solution to change the way - how developers install PHP packages eg., TYPO3 Extensions - Call Composer.
Packagist.org is the main repository to connect your TYPO3 packages.
But here is the real problem, Packagist has only featured to publish your OpenSource public TYPO3 packages. It contains thousands of PHP packages.
What about your TYPO3 private packages? You may have private packages stored at your private Git repositories like Github, Gitlab, Bitbucket etc.
How can you provide your private TYPO3 packages and packages your customer or teams? That’s a reason, you are still here to know how? And of course, If you are facing performance issues with packagist.org ;)
Option 1: SaaS Solution by Packagist.com
This option is awesome, If you have a good budget for your private projects :) It’s been developed and maintained by the same team of Packagist.org, We have tried the trial version and looks promising with great features like;
- Easily integrate with your favourite Git tools like Github, Gitlab and Bitbucket
- Very user-friendly user-interface to host your private repositories
- Much faster and reliable for deployment
- Access and restriction options
After all, It’s made by the creators of the Composer!
What is Satis?
Well, Satis is an OpenSource project for static composer repository generator. Here is the source https://github.com/composer/satis also it’s been mentioned at the official guide at Getcomposer.org
Let’s proceed with step-by-step guide to everything like setup TYPO3, create webhooks, security & authentication etc., as follows.
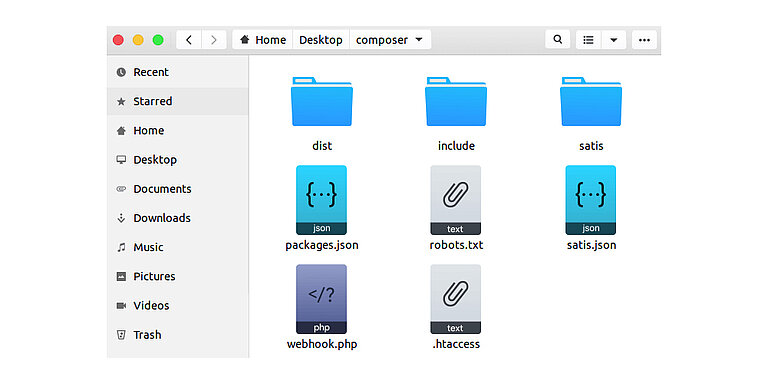
Just to give you an impression, Once you install and configure whole Satis setup, then you will have the final setup as follows.

Step 1. Installation of Satis
Pre-requisites
- We suggest creating one subdomain like https://composer.yourdomain.com/
- Composer >= 1.9
- PHP >= 7.2
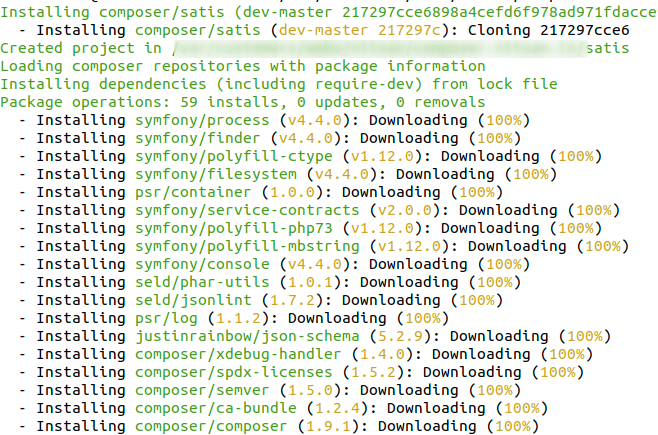
Install Satis
Go to your favourite command line and enter the following command
composer create-project composer/satis --stability=dev --keep-vcsStep 2. Configure satis.json
At your root folder, Create satis.json and let’s configure your private repositories as follows.
{
    "name": "Repository Name",
    "homepage": "https://composer.yourdomain.com",
    "archive": {
        "directory": "dist",
        "absolute-directory" : "/path/to/save/packages/",
        "format": "zip",
        "skip-dev": true
    },
    "require-all": true,
    "require-dependencies": true,
    "require-dev-dependencies": false,
    "output-html": true,
    "repositories": [
        {
            "name": "vendor/package1", "type": "vcs", "url": "https://gitlab.com/vendor/package1.git"
            },
        {
            "name": "vendor/package1", "type": "vcs", "url": "https://github.com/vendor/package2.git"
            },
        {
            "name": "georgringer/news", "type": "vcs", "url": "https://github.com/georgringer/news"
        }
    ],
    "require": {
        "vendor/package1": "*",
        "vendor/package2": "*"
    }
}Most of the setup is self-explained, although Let me try to write quick important configuration options of satis.json
- absolute-directory: Set the current root folder to have a “dist” folder within your domain.
- require-dependencies: Satis will automatically download dependent other repositories.
- output-html: Keep set true, it will generate nice formatted index.html
- repositories: Configure your all private as well as public repositories using Git.
- require: From here, Satis will generate packages.
Step 3. Generate Satis For Composer Packages
Now you are all set to build satis packages at your composer-server. Run the following command.
Syntax: php bin/satis build <configuration file> <build-dir>Example: php satis/bin/satis build satis.json ./Explain the command:
- php: Your php bin path (generally php globally works)
- satis bin: As we have satis folder, so define satis/bin/satis
- build: is a command to generate packages
- satis.json: As we have configured satis.json at the root
- packages path: The path to generate package listing (with index.html)
If you have configured your private repositories of Git tools, It should ask you for authentication as username and password.
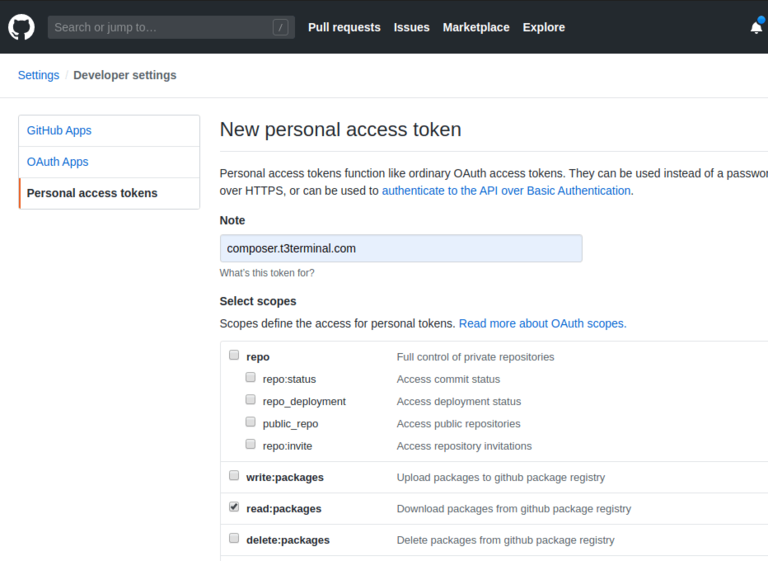
It’s just first-time you need to add user/pass, it will save credentials at composer’s auth.json for future use.
Once successfully run the build command, It will generate packages.json + dist folder with all the packages are downloaded in .zip files. Take a look at the structure of the “dist” folder.
Also, Go to your https://composer.yourdomain.com/index.html You should be able to have a nice interface with all your generated packages information.
Step 4. Test-drive with Your TYPO3 Private Packages with Composer
Now, It’s time to have a test-drive at your TYPO3 composer-based project.
1st Configure your composer.json
"repositories": [
    {
        "type": "composer",
        "url": "https://composer.yourdomain.com/"
    },
    {
        "packagist.org": false
    },
    {
        "composer.typo3.org": false
    }
],2nd Run composer install command
composer require vendor/package-name ^1Hurray!
Your satis packages should download from the latest extension from your Composer server.
If you are facing any issues, then check out more details by passing -vvv to your command.
Step 5. Webhook between your TYPO3 Private Repositories & Satis
Of course, Story is not over yet, You will need to work on a couple of more tasks ;)
Now you should make a bridge to keep connected your TYPO3 private packages between Git & Satis. Whenever your team releases something at Git tool, then it should be automatically grabbed by your Satis composer server.
That’s why You will need to prepare the so-called “webhook”. For that, let’s create one PHP-script.
webhook.php
<?php
    // Set Composer home (also if not work then set to .htaccess)
    putenv("COMPOSER_HOME=/your/home/.composer");

    // Initiate Symfony
    require_once __DIR__.'/satis/vendor/autoload.php';

    use Symfony\Component\Process\Process;

    // Basic-Configuration
    $config = array(
        'bin' => '/your/path/satis/bin/satis',
        'json' => '/your/path/satis.json',
        'webroot' => '/your/path/',
        'user' => null,
        'secretykey' => 'set-your-secret-key',
    );

    // Validation Testing
    if (!file_exists($config['bin'])) {
        die('The Satis bin could not be found.');
    }

    if (!file_exists($config['json'])) {
        die('The satis.json file could not be found.');
    }

    if (!file_exists($config['webroot'])) {
        die('The webroot directory could not be found.');
    }

    // Switch to user
    if (null !== $config['user']) {
        $command = sprintf('sudo -u %s -i', $config['user']);
        exec($command);
    }

    // Option 1: For direct update from Browser can use the package get parameter to pass the repo url to update. Eg., https://composer.yourdomain.com/?package=giturl
        if(!empty($_GET['package'])){
        $command = sprintf('%s build %s %s %s', $config['bin'], '--repository-url '.htmlentities($_GET['package']), $config['json'], $config['webroot']);
    }

    // Option 2: Gitlab Webhook
    else if(!empty($_SERVER["HTTP_X_GITLAB_TOKEN"])){

        // Validate Secret Tocken
        if ($_SERVER["HTTP_X_GITLAB_TOKEN"] == $config['secretykey']) {
                $input = file_get_contents("php://input");
                $json = json_decode($input);
                if (!is_object($json)) {
                die('No valid JSON');
            }
            if ($json->object_kind == "push" || $json->object_kind == "tag_push") {
                $repoUrl = $json->repository->git_http_url;
                $command = sprintf('%s build %s %s %s', $config['bin'], '--repository-url '.$repoUrl, $config['json'], $config['webroot']);
            }
            else {
                die("Invalid Push Event from Gitlab!");
            }
        }
        else {
            die("Invalid Gitlab Secret Key!");
        }
    }

    // Option 2: Github Webhook
    else if(!empty($_SERVER["HTTP_X_HUB_SIGNATURE"])){

        // Validate Secret Tocken
        $signature = $_SERVER['HTTP_X_HUB_SIGNATURE'];

        if ($signature) {
            $hash = "sha1=".hash_hmac('sha1', file_get_contents("php://input"), $config['secretykey']);
            if (strcmp($signature, $hash) == 0) {
                $payload = json_decode($_POST['payload']);
                if (!is_object($payload)) {
                    die('No valid JSON');
                }
                $repoUrl = htmlentities($payload->repository->clone_url);
                $command = sprintf('%s build %s %s %s', $config['bin'], '--repository-url '.$repoUrl, $config['json'], $config['webroot']);
            }
            else {
                die("Invalid Github Secret Key!");
            }
        }
        else {
            die("Invalid Github Secret Key!");
        }
    }

    // Prepare Default Shell-Command eg., For daily-cron
    else {
        $command = sprintf('%s build %s %s', $config['bin'], $config['json'], $config['webroot']);
    }

    // Final command to execute
    if (!empty($command)) {
        $command = "/usr/bin/php7.2 ".$command;

        // Execute final command to build Composer-server
        $exitCode = exec($command);

        // Error-handeling
        $process = new Process($command);
        $exitCode = $process->run(function ($type, $buffer) {
            if ('err' === $type) {
                echo '<br><strong>Error:</strong> '.$buffer;
                error_log($buffer);
            } else {
                echo '.';
            }
        });

        $returnMsg = '<br><br>Satis mirror : '.($exitCode === 0 ? 'Successful rebuild '.(!empty($_GET['package']) ? ' of package '.htmlentities($_GET['package']).'.' : ' of entire index!') : ' An error occured! : '.print_r($exitCode, true));
    }
    else {
        $returnMsg = "<br>No command found!";
    }

    echo "<br>" . $returnMsg . "\n";
?>Uuf! Bit long-code, but very self-explained & no worries, it’s been well-tested ;)
Now, Let’s set webhook.php to your favourite Git tools. So, whenever you release push or release tag from your Git then it will inform your Satis Composer-server to generate new TYPO3 packages at your private server.
How to use Webhook to generate TYPO3 Private Packages?
- Option 1: Update packages through Web-URL
You can run webhook.php at your web-browser eg.,
https://composer.yourdomain.com/ webhook.php?package=https://github.com/vendor/package.git
Webhook has been designed in a way to only get a particular repository to your Satis composer server.
- Option 2: Integrate Webhook to your Git tool
You can easily configure this webhook at your favourite Git tool like Github, Gitlab, Bitbucket etc., Here are a few examples.
Webook at Github
- Step 1. Go to your Repositories > Settings > Webhooks
- Step 2. Click on “Add webhook”
Step 3. Edit your webhook, You can test-drive by Submitting “Test”, and able to checkout request and response.
Step 6. Setup Cron to Crawl Automatic TYPO3 Private Packages
We suggest setting CRON to regularly crawl your TYPO3 private packages from each of your each Git repositories.
Let’s see an example,
Daily 12 o’clock run the cron
* * * * * usr/bin/php7 /var/www/your/path/satis/bin build /var/www/your/path/satis.json /var/www/your/path/
Step 7. Secure Your TYPO3 Private Packages at Composer-Server
I know, your first question may be how to secure your packages at Composer server?
Fortunately, there are many ways to protect and give access/authentication to your customer or team as follows.
Tips
Make sure to setup robots.txt to disable SEO crawling.
Here are lists of security options available as follows.
Option 1. SSH (requires the SSH2 PECL extension)
{
    "repositories": [{
        "type": "composer",
        "url": "ssh2.sftp://yourdomain.com",
        "options": {
            "ssh2": {
            "username": "composer",
            "pubkey_file": "/home/composer/.ssh/id_rsa.pub",
            "privkey_file": "/home/composer/.ssh/id_rsa"
            }
        }
    }]
}Option 2. SSL/TLS (HTTPS) using a client certificate
{
    "repositories": [{
        "type": "composer",
        "url": "https://yourdomain.com",
            "options": {
            "ssl": {
            "local_cert": "/home/composer/.ssl/composer.pem"
            }
        }
    }]
}Option 3. Custom HTTP Header field for token authentication
{
    "repositories": [{
        "type": "composer",
        "url": "https://yourdomain.com",
        "options": {
            "http": {
                "header": [
                "API-TOKEN: YOUR-API-TOKEN"
                ]
            }
        }
    }]
}Now imagine, you have a customer who buys your great TYPO3 package from you. He wants to install a composer-based TYPO3 extension. As composer supports, http-based authentication,, so practically that’s suite the solution, Here is the step-by-step guide to setup security and password-protected TYPO3 private packages for a composer.
Step 1. Setup .htaccess
# Let’s allow webhook.php to access for your Git-tools
<FilesMatch "webhook.php">
    SetEnvIf Request_URI "webhook.php$" allow
    Order allow,deny
    Allow from env=allow
    Satisfy any
</FilesMatch>

# Let’s set authentication
AuthUserFile /path/to/.htpasswd
AuthType Basic
AuthName "My Composer Restriction"
Require valid-user
Step 2.Create .htpasswd
Add your username and password, You can use cool-tools like
https://www.web2generators.com/apache-tools/htpasswd-generator
That’s it, Now let’s try to access your server at your TYPO3 composer-based installation.
Test-drive Authentication at Your TYPO3 Composer
Step 1. Configure your composer.json
Make sure to configure composer.json with your composer-server instead of packagist.org, Checkout above test-drive topic.
Step 2. Ask for Authentication
So, a composer will look at your server to download the latest TYPO3 private packages, and it should be asking for Authentication.
Individual Package’s Authentication Access
Hmm, so you are looking for authentication to each TYPO3 package separately, no worries, You can easily configure endless possibilities with your .Htaccess and Server too.
.htaccess
# Let’s allow webhook.php to access for your Git-tools
<FilesMatch "webhook.php">
    SetEnvIf Request_URI "webhook.php$" allow
    Order allow,deny
    Allow from env=allow
    Satisfy any
<FilesMatch>

# Configure your package1
<FilesMatch "^(your-package1-prefix.*)\.(zip)$">
    AuthName "Access of My Composer"
    AuthUserFile /access/.htpasswd_your_package1
    AuthType basic
    Require valid-user
<FilesMatch>

# Configure your package1
<FilesMatch "^(your-package2-prefix.*)\.(zip)$">
    AuthName "Access of composer.t3planet.com"
    AuthUserFile /access/.htpasswd_your_package2
    AuthType basic
    Require valid-user
<FilesMatch>Notes: To get a hint to what exactly to set in FileMatch, Just go to your /dist/vendor/package to the end zip file. You can set a prefix match from that zip file.
Wrap-up!
- For your composer, If you want Private packages access or better performance compared to packagist.org, Then just go with great Satis solution.
- You can realize now, To create your TYPO3 Private Packages is quite easy, Just try all above Step 1 to 7 to Install and configure Satis composer-server.
- All steps are well-tested, so we are sure you will not get any big trouble.
We hope you like this easy guideline to setup Satis, Do you know any other ways to create TYPO3 Private Packages for Composer. Feel free to write at the comment box, in-case if you have any troubles or issues.
Please share this article in your TYPO3 networks.
Have a Happy time with a great Composer :)


Thanks for your feedback and appreciation, It means lots to us.
About speed/performance issue is well-known in PHP-composer world, there can be many reasons like your server performance, connection issues, the heavy-load issue on packagist.org site, any misconfiguration at your server etc. eg., Lots people talk about different issue at https://stackoverflow.com/questions/28436237/why-is-php-composer-so-slow
IMHO, You need to keep trying best practice to maintain your composer repository server eg., Set daily/weekly CRON to continuously update (to cache and save time ;)
Cheers,
Sanjay