Got your website a new TYPO3 Template? Congratulations!
Switching your TYPO3 Template is something that requires some pre-preparation, especially when you've been using the same template design for quite a long time. While the genuine procedure of changing the TYPO3 Template is simple, you'll need to get ready already in advance to avoid any problems with your site after you make the switch.
By getting ready, we mean to be sure that your new template won't break any of your current TYPO3 website's components or features. The best way to guarantee that is by testing your new TYPO3 template in a safe environment, and that's what we'll share the best ways to do so.
In this article, we’re going to talk about why it’s important to avoid any and all risks while changing the TYPO3 Template. Then, we’ll guide you through the process in three steps. Let’s get to work!
Why should you be careful while changing your TYPO3 Template?
In fact, changing TYPO3 Templates is simple and especially if you've got them from T3Planet, you can install it in a single click! All you need to do is upload your new template to your website and activate it. It's a procedure that can take just a few minutes if you have all your template files ready.
Do you know?
TYPO3 Templates from t3planet.comes with instant installation, with Plug and Play concept.
But on an off chance many times the process of switching your TYPO3 template doesn’t always go smoothly. In our experience, the longer you’ve used the same theme, the more likely you are to run into errors when changing to a new one.
- Some of your TYPO3 website’s elements may get incompatible or may stop working
Your new template may not be compatible with one or more of your existing extensions or 3rd party extensions, for example.
- Any customizations you’ve made to your template may disappear
If you’ve altered your template’s code – or even set up a child theme – those changes may get lost.
- Your pages may not display correctly
Some template contains their own visual features that may not translate well to another template.
Well well, these issues don’t mean that you should never change your template– these are some of the most common issues that arise while switching to a new template. It's just that you need to be careful while doing so.
To initiate, you’d need to select the new perfect TYPO3 Template to replace your current choice. There are some constraints to choosing a genuine TYPO3 template, and you should keep them in consideration in your search. Once you know what template you want to switch to, then you can change your template thoughtfully and carefully.
Key Points to take care of before and after changing your TYPO3 Templates
If you want to avoid creating compatibility issues or breaking aspects of your TYPO3 site, it’s smart to follow Template replacements methodically and read specifications and documentation well. Here’s how we recommend you do just that.
Step #1: Create a staging site to test your TYPO3 Template
You can always set up your own staging site in multiple ways, such as manually or by using any specialized TYPO3 extensions.
Step #2: Create a backup of your TYPO3 website
In the first place, you should never attempt a significant update of the TYPO3 website of your site without taking proper Backup of your website and every resource associated with your website. All things considered, something can generally turn out to go wrong. On the off chance if that does, then having a recent backup of your websites' data gives you an effortless method to re-establish your TYPO3 website to its last working state.
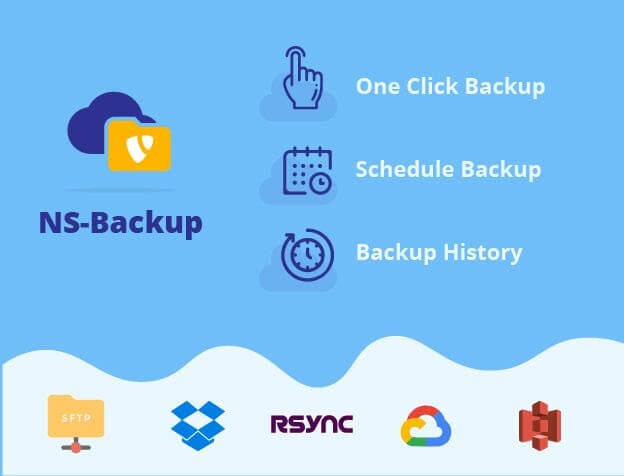
If you’ve never created a TYPO3 backup for your website, we recommend using the Backup Plus TYPO3 extension, which makes the process simple. Plus, it enables you to automate your backups with a simple click, so you won’t have to perform them manually.
Key Features of Backup Plus TYPO3 Extension
- Dashboard
- Start One-click Manual Backup
- Global Settings
- Database Backup (MySQL)
- TYPO3 Code Backup (Core, Extensions, Vendors)
- All-in-one Backup
- Connect & Configure Your Servers and Clouds
- Google Cloud/Drive, Amazon S3, Dropbox Cloud, Rsync, etc)
- Backup Logs & History
- Schedule Backups
- Integration with TYPO3 Core Scheduler
- TYPO3’s standard Integration with Symfony Console Command
- Compress backups (bzip2, gzip, xz, zip)
- Automatically Cleanup your local and server/cloud backup
Step #3: Set your website into Maintenance Mode
While you are switching to your new TYPO3 template, we recommend you to set your website into maintenance mode.
The reason why it’s important to know how to put your website into maintenance mode is simply that when you’re updating your website, customizing your template, or doing anything else that might cause visitors to reach a poorly functioning website, it’s much better to tell them to come back in a couple of minutes when it’s all done.
You can use T3Terminal’s Free TYPO3 Template, T3 Coming Soon: Maintenance Mode TYPO3 Template especially built for maintenance mode.
Moreover, you can always use the TYPO3 Maintenance Mode Extension that will help you with simple plug & play which have a special TYPO3 Page & Template.
Step #4: Testing your website vigorously at Staging mode
Woohoo, at this stage now you’re ready to upload and activate your latest TYPO3 template on your staging website. And now, it’s time to start the testing process. Now you must go through each of your pages, blogs, elements, and extensions to check for errors. What may go wrong will depend on your unique setup, but here’s what you’ll want to pay attention to:
- Check all your pages and a variety of posts, to make sure they’re displaying as they should.
- Go through your extensions one by one, and test them thoroughly, by all means, to ensure their functionality they add is still working as expected.
- Test out all the navigational links, they should all lead and direct to their true destinations.
Many times changing TYPO3 templates will shake up the look of your site. However, all its major features should still work. If that isn’t the case, you probably need to look for a better-coded alternative.
When you've checked your website at staging thoroughly and you’re sure that your new template won’t break your site, you can return to your live TYPO3 website and activate the template there. On the safer side to be safe, you’ll still want to test everything one more time. But if you’ve followed all of these steps, you should be safe from any site-breaking errors and ready to start enjoying the new look of your TYPO3 website!
Step #5: Follow general checklist Post Template Deployment
Before you are going to launch your TYPO3 site, You should consider DoD with QC (Quality Checklist) and QA (Quality Assurance) TYPO3 testing of your website. You can go through 15 Checklist Points For Your TYPO3 Testing. Moreover here is a quick glimpse of the checklist you need to follow after your template has been deployed. Make sure you don’t miss any of the points!
1. Harden the Security
2. Protect Website Against Spam
3. Configure an SEO Extension
4. Add Google Analytics Code
5. Check all Permalinks
6. Add Social Share Images
7. SSL Certificate for the Website
8. Check Favicon
9. Add a perfect Logo
10. Allow Search Engine Indexing
11. Submit Website to Google
12. Review Cross Browser Compatibility
13. Test Website on Different Devices
14. Check for Broken Links
15. Optimize Images on the Website
16. Check Your Grammar and Spelling
17. Proofread Content on all Pages
18. Update the Admin Email Address
19. Check Timezone Settings
20. Remove Unwanted extensions, Images, etc.
21. Remove All Unwanted Pages/Posts
23. Check all Forms on the Website
24. Check Performance
25. Check SEO and Overall Grades
26. Uptime Monitoring
Step #6: Transfer Carefully from Staging to Live server
Now comes the stage where you need to migrate your staging website to a live website is definitely a complex thing that requires a lot of carefulness and attention to detail, as well as a commitment to properly backing everything up. It also requires a pretty clear understanding of database tables and FTP (File Transfer Protocol). But with a commitment to those things, you can successfully transfer your Staging site to a live site.
Summing it up!
Changing the TYPO3 template sounds simple, but if your website has been around for a while, the switch can have unexpected consequences. For example, a new template might not play nicely with your existing design or your extensions. That doesn’t happen often, but it’s still important for you to test any new theme you want to use before installing it on your site. If you face any difficulties while switching your TYPO3 template, feel free to reach us for help.
Happy TYPO3 switching!


Woher weiß ich denn, ob meine Vorlage eine TYPO3 Vorlage ist? Ich möchte gerne das Template bei https://www.chris-hortsch.de/webdesign-blog/berlin-template-PSD-webdesign.html runterladen, dort steht aber nichts von TYPO3 dabei...
Liebe Grüße
Floyd